Overview
Schedule Assist allows you to schedule technical meetings, on-site visits, and other appointments with your customers directly through the MSP Process PSA Pod. You can send customers a booking link from within a ticket, share a scheduling link outside of a ticket, or book an appointment on the spot.Pre-requisites
If you have not already setup ScheduleAssist, please review the ScheduleAssist: Admin Setup for further information. Before using Schedule Assist, make sure the following pieces are in place:- Your team has company shared appointment types created (for example: support call, sales call, on-site visit, phone call) that any tech can assign.
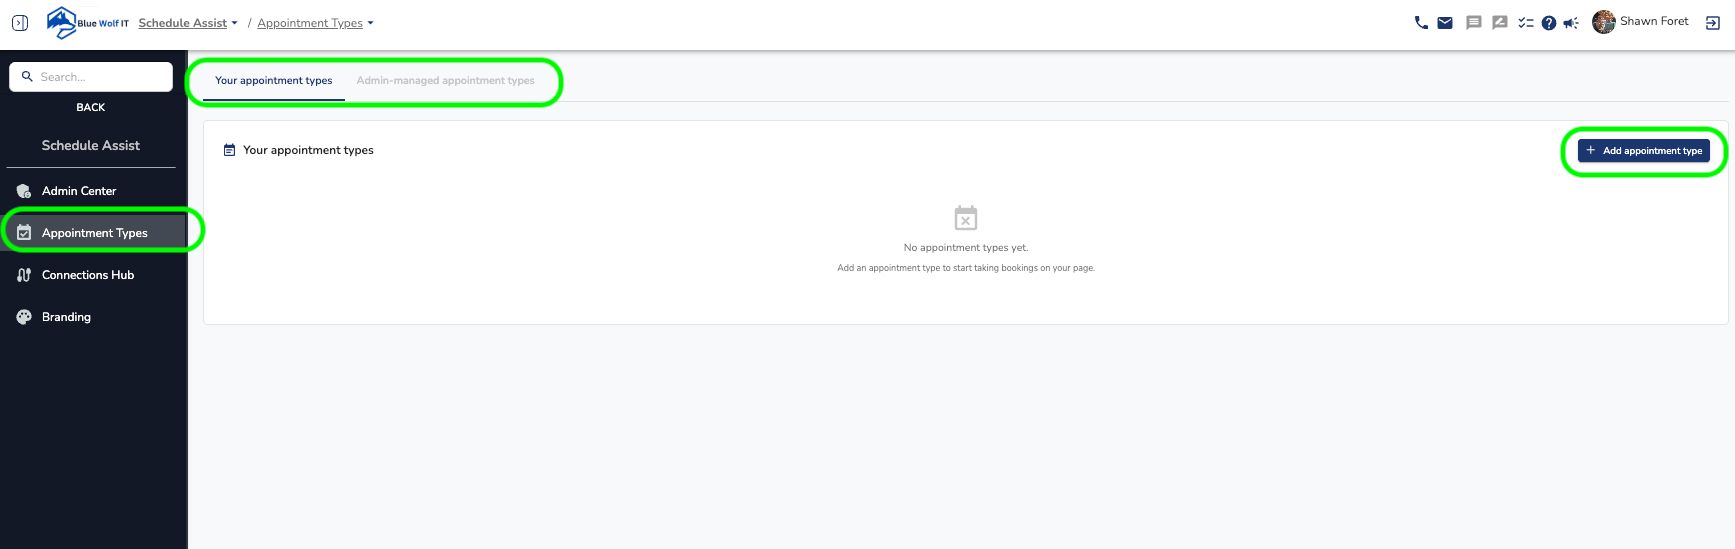
- Any techs who need their own appointment types have set them up in the MSP Process portal under Schedule Assist > Appointment Types.
- Each tech is assigned to the company shared appointment types they need.
- A tech can only schedule a company-shared appointment type they have been assigned to.
Creating a New Appointment Type
- Click Add Appointment Type in the top-right corner.
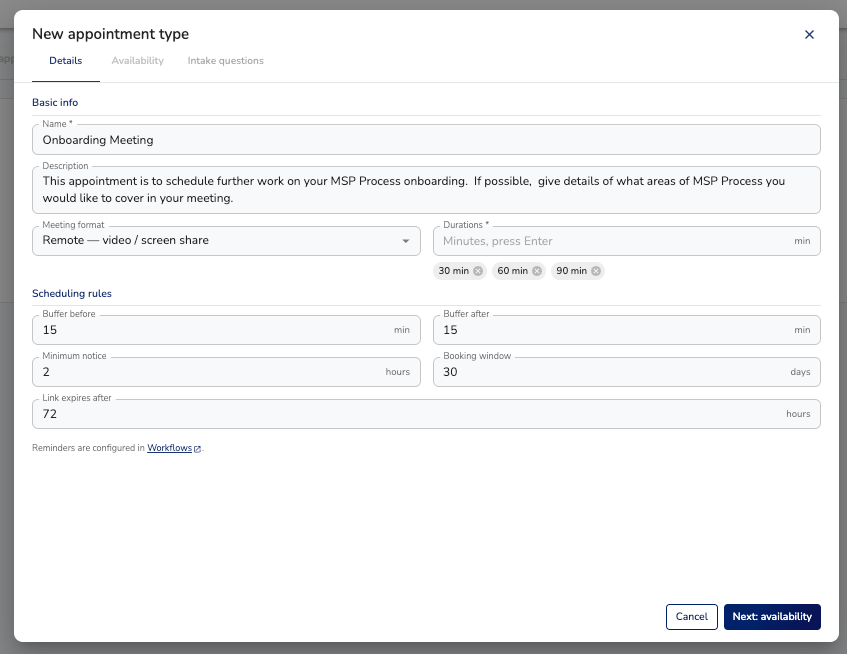
- Fill out the form to describe the appointment.
- If the appointment is for an on-site visit, consider adding a buffer before and/or after to allow travel time to and from the site.
- Click Next in the bottom right to set your Availability Hours*.*
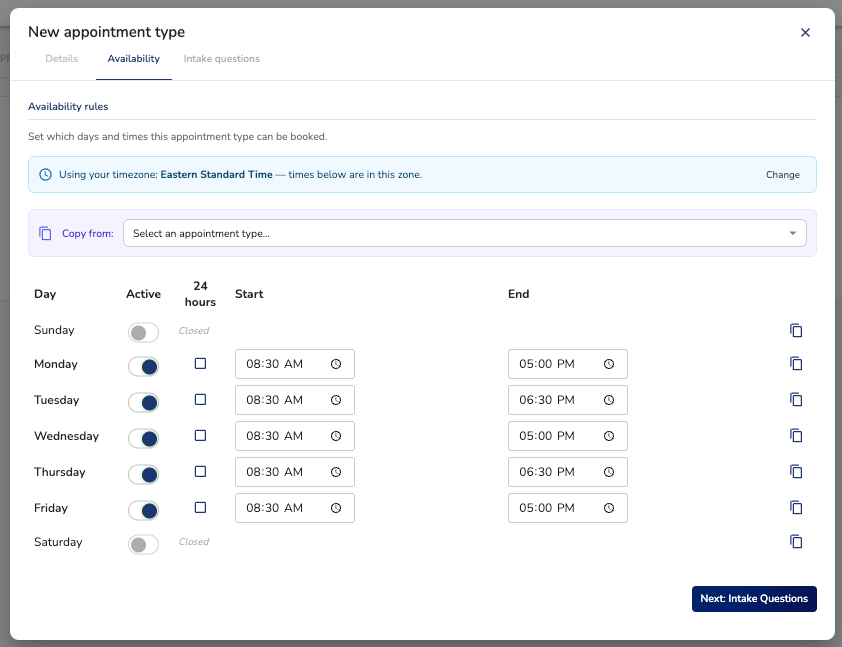
- Click Next: Intake Questions to move on to Intake Questions.
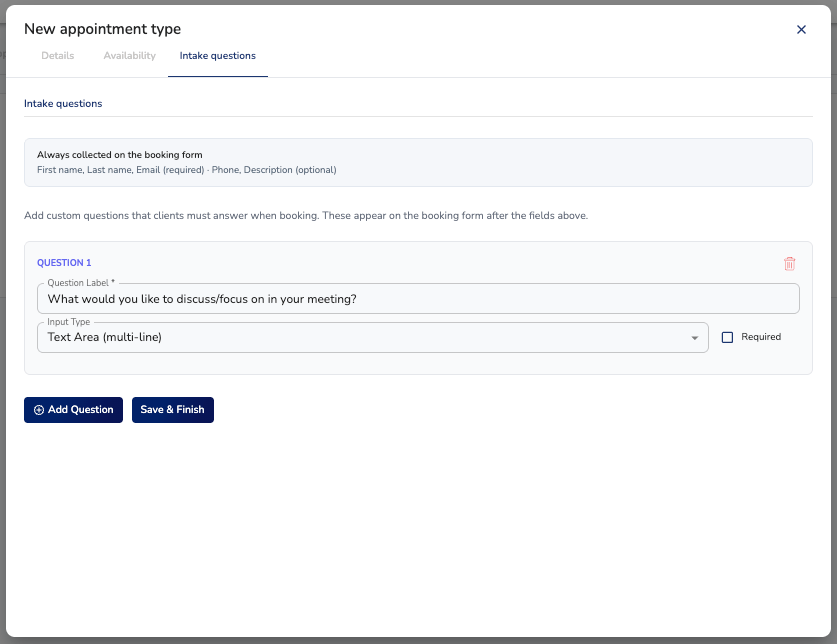
- Enter any questions you would like to ask the person booking, then click Save & Finish.

How to Use (Step by Step)
- Log into your PSA and open an active service ticket (or contact).
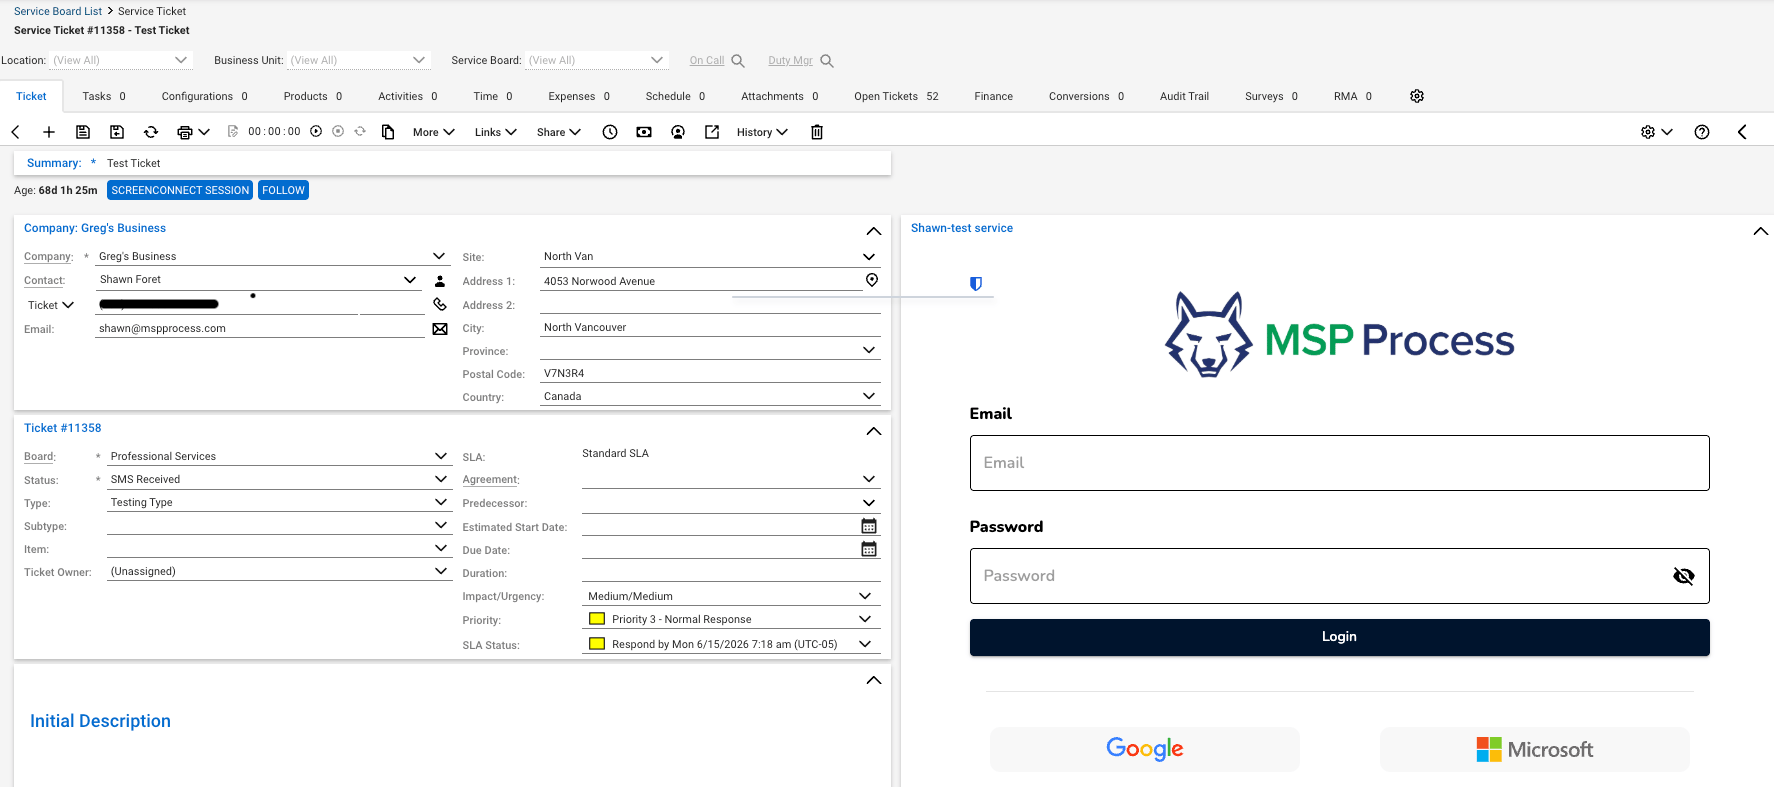
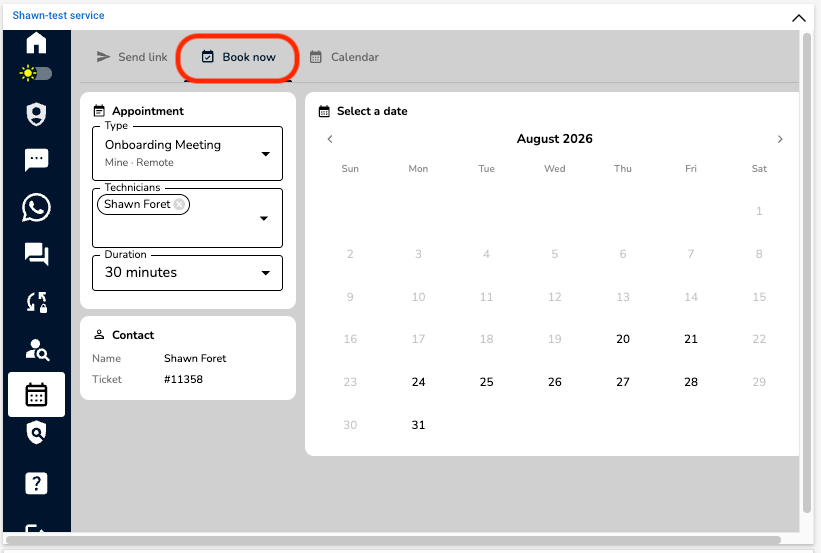
- Log into your MSP Process pod and click the Schedule Assist icon in the menu (it looks like a calendar).
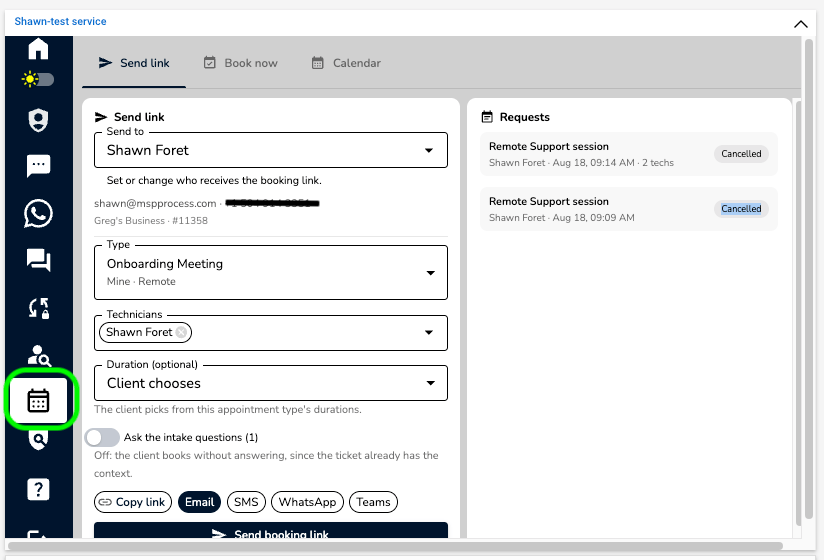
- Select the meeting type, the duration (if you want to lock in a maximum ticket duration for this appointment), and any technicians required for the appointment.
- Choose how you would like to send the appointment to the customer, then click Send booking link at the bottom. This sends the customer a link to your schedule so they can book their appointment.
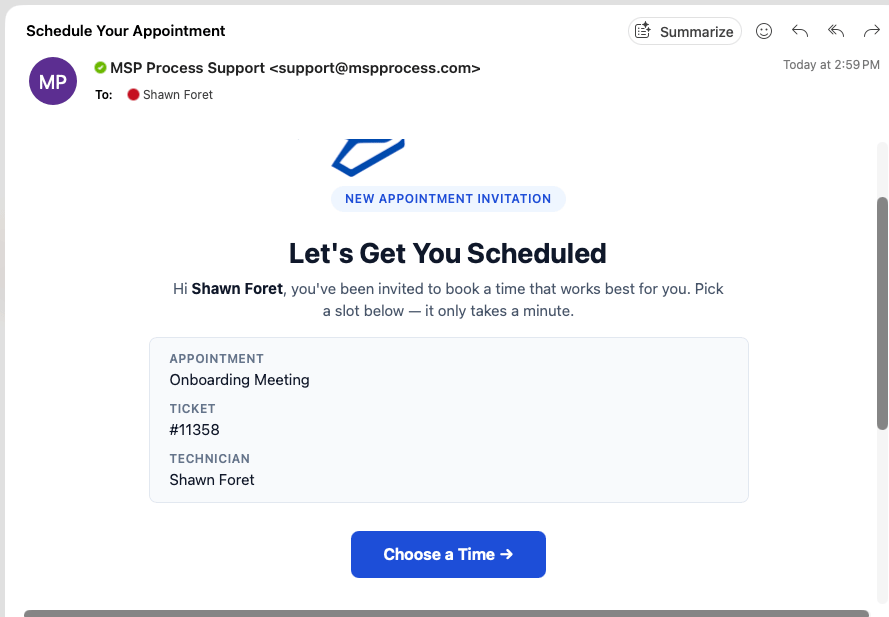
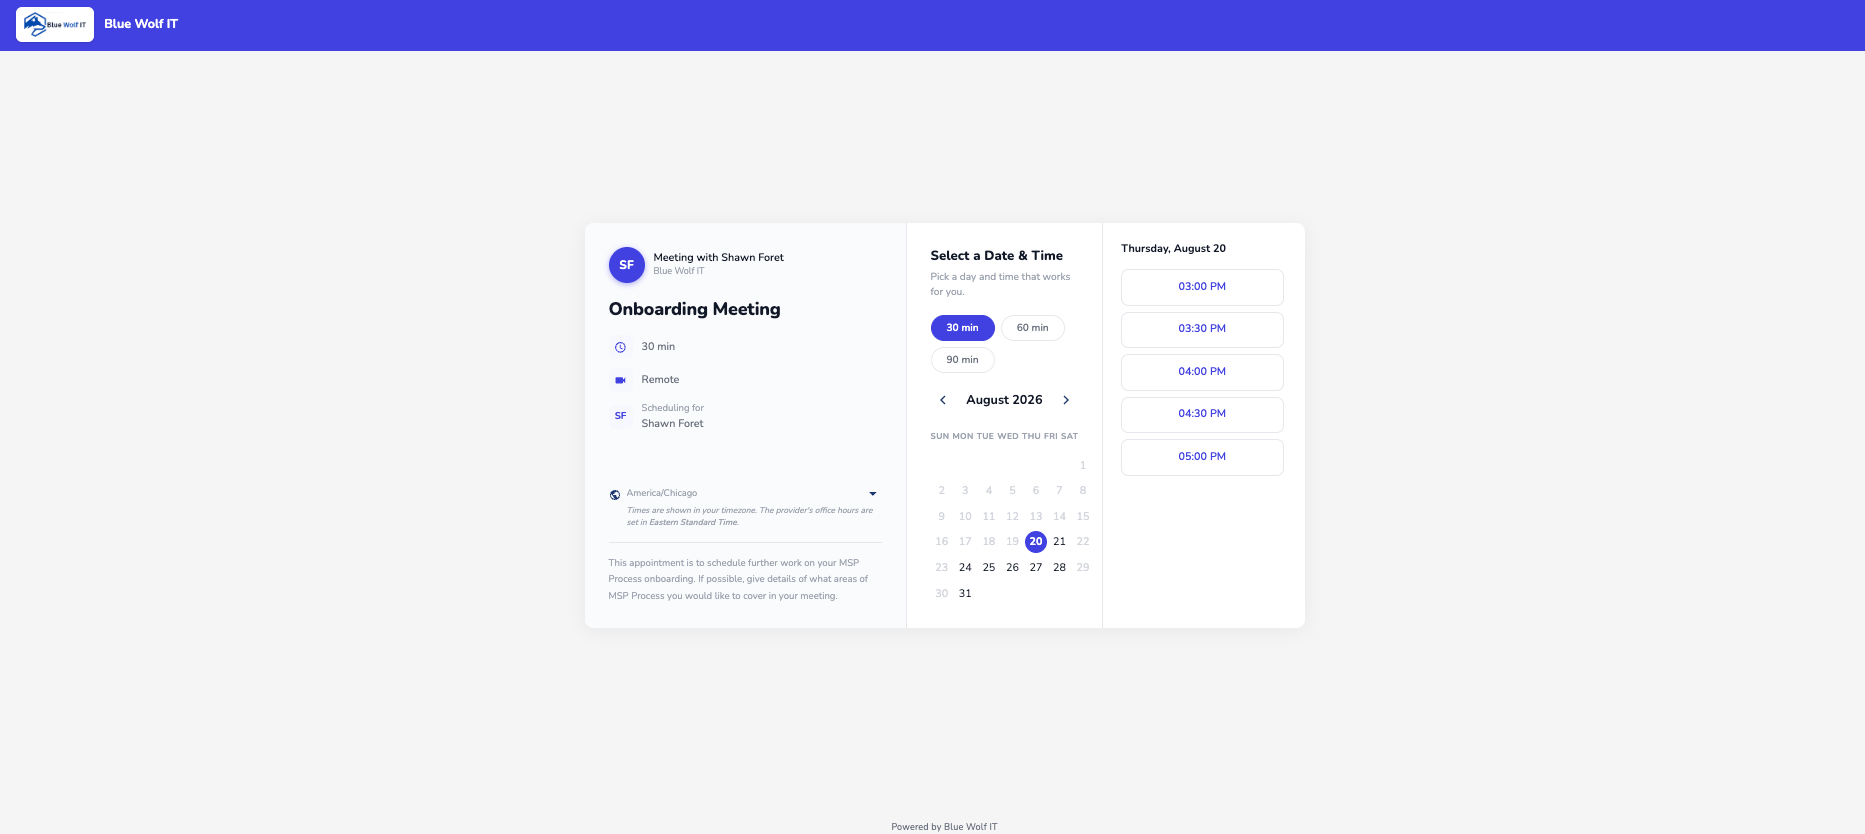
- When your customer clicks the link in the email, they will see a scheduling page like the one below.
- The customer selects the duration, date, and time, then clicks Confirm booking.
- Once they confirm, they will see the appointment details and receive a confirmation email.
- Once they confirm, they will see the appointment details and receive a confirmation email.