

Overview
ScheduleAssist lets your technicians connect their calendars (Microsoft 365 or Google) and generate unique, branded booking links so clients can schedule appointments directly from a ticket. It checks a technician’s calendar and your PSA together to find real availability, and automatically writes confirmed appointments back to the PSA. Please note that ScheduleAssist currently does not support Project Tickets in ConnectWise. This is currently in progress. This guide walks you through the one-time configuration needed to get ScheduleAssist ready to use. For day-to-day usage (generating booking links, managing appointments), see the “Using ScheduleAssist” article.Pre-requisite
- A Global Admin account for your Microsoft 365 tenant (if you’re connecting Microsoft 365 calendars), or admin access to your Google Workspace (if connecting Google).
- Admin access to your MSP Process account.
Step 1: Connect Your Calendar
- Navigate to the Checklist Icon in the top-right when you log in to MSP Process (this will open up the Setup Wizard).

- Click #8 in the Setup Wizard to skip to ScheduleAssist.
- Alternatively you can navigate to Settings \> Account Settings \> Setup Wizard.
- Set your company’s time zone.
- Connect your company’s calendars.
- Choose to connect with Microsoft 365 or Google.

- For Microsoft 365, this requires org-wide admin consent from a Global Admin — an individual user granting consent for themselves isn’t enough to connect the team’s calendars.
- Set you business’ hours of operation. This is used to set the hours which users can book time with your technicians.

Step 2: Set Up Your Technicians
- Go to ScheduleAssist > Admin Center.
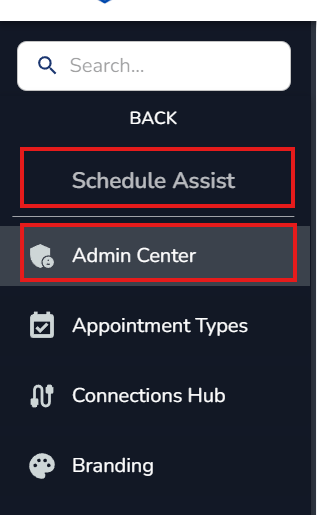
- Review your list of technicians. If someone’s calendar needs to be connected manually, locate their name or search for them, then click the ellipsis on the right-hand side of their row, and click View details. their matching PSA account.
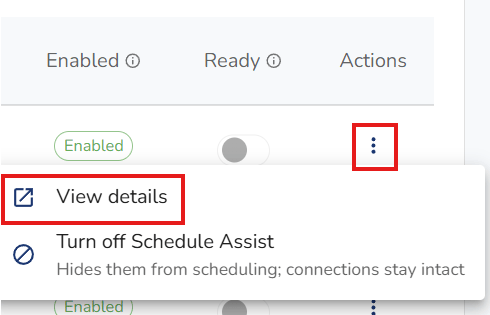
- Exclude any technicians who won’t be using ScheduleAssist.
- Use the bulk action option to mark all matched, connected technicians as “ready” at once, rather than updating them one by one.
Good to Know
- Offset shifts: If your technicians work different hours (e.g., one starts at 8, another at 9), a single appointment type currently applies the same availability window to everyone assigned to it. If you need different hours per technician, create a separate appointment type for each shift and assign technicians accordingly.
- Booking window: There’s currently no way to cap how far in advance a client can book an appointment. Keep this in mind for appointment types tied to urgent or time-sensitive requests.
- Where to look for appointment types: Appointment types you create yourself and appointment types your organization’s admin has set up appear under separate tabs (“Your Appointment Types” vs. “Admin Managed Appointment Types”) — check both if you’re not seeing one you expect.