

Requirements
For your end-users to be able to use the Technician Verification feature, you will need to ensure that your Technician Verification settings are reviewed and adjusted through MSP Process. You can customize the following:- Verification Message Code
- Confirmation Message
- The auto-responder when a SMS for ticket is sent to Verification Number
- Ticket Confirmation Log
Overview
This article will go over the different ways that your end-users can verify your technicians, allowing them to feel secure in sharing information with your support team. There are four ways to have your technicians verified:- Technician Verification Widget
- SMS
- Through a client portal
- Through a client portal app
Technician Verification Widget
The Tech Verification widget allows you to put safeguards in place, so your customers are not falling victim to an identity phishing attack. Easily embedded as an iframe in your website, the Tech Verification Widget makes it easy for your customers to verify the identity of the technician they are speaking with.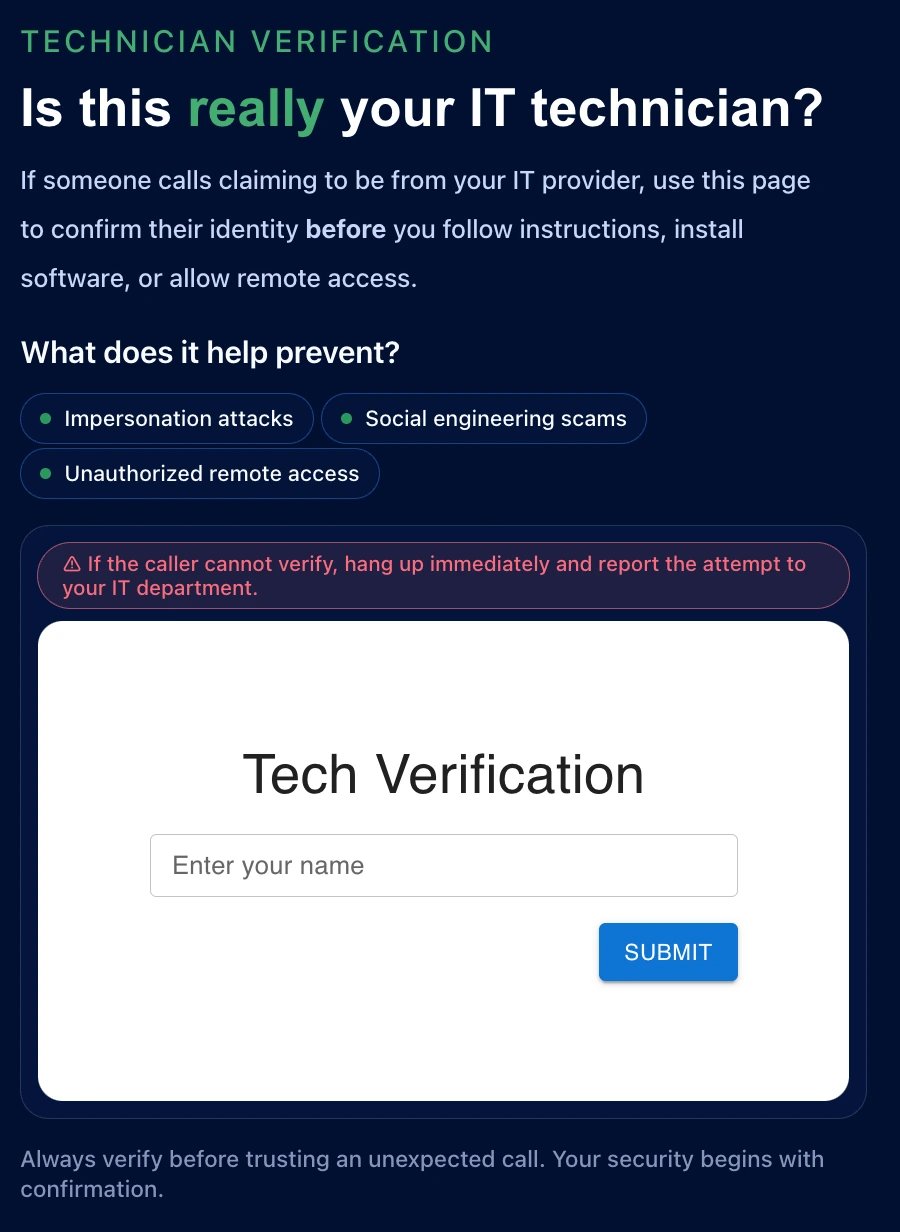
Technician Verification through SMS
This process of verification is fairly straightforward. The end-user sends a text “#verify” to the number you have provided to them. Your technician and the end-user are both provided a randomly generated 6-digit code. The Technician will then provide the code to the end-user and assigns the verification to the ticket in progress for tracking. The end-user will then text “#confirm” to the same number to confirm the verification was successful. The end-user receives back an automated message showing the verification was completed successfully.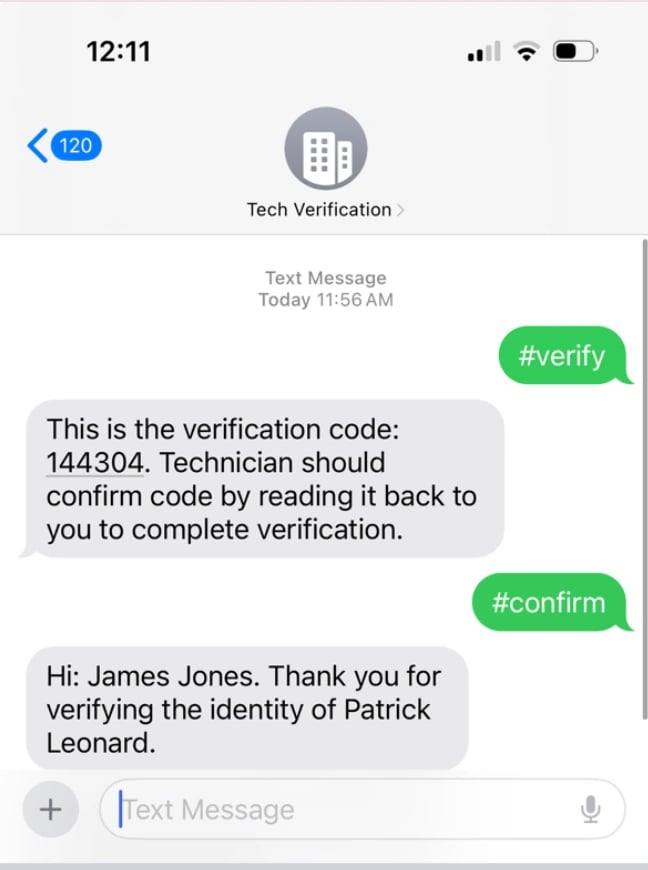
Client Portal Teams App and Client Portal Mobile App Technician Verification
Your end-users can also verify your technicians through the Client Portal in Teams or through the MSP Client Portal app. If you would like to learn more about adding the Technician Verification tab into your client portal in Teams, please review How to Add Custom Tabs to Your Microsoft Teams App.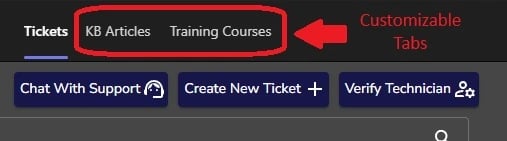
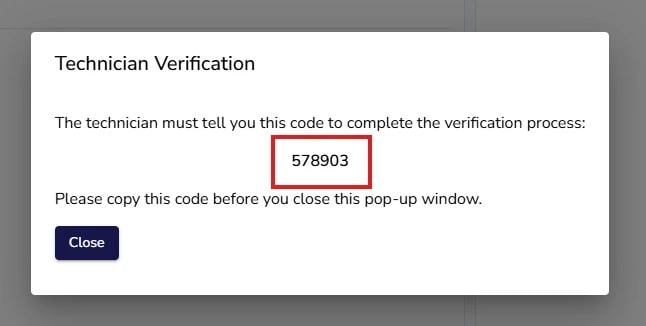
Client Portal in Teams
Your end-users will simply need to click the “Verify Technician” option.
MSP Client Portal App
To verify your technician in a Client Portal app, your end-users will need to select the shield with the silhouette (Technician Verification) on it in the top-right hand corner.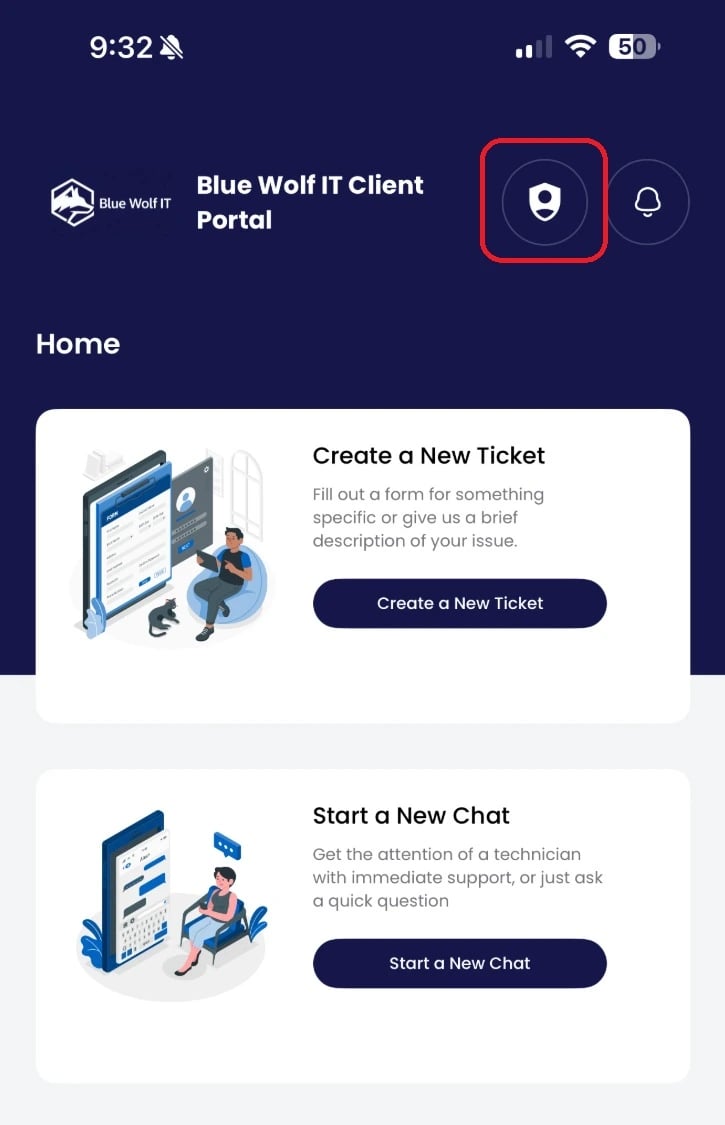
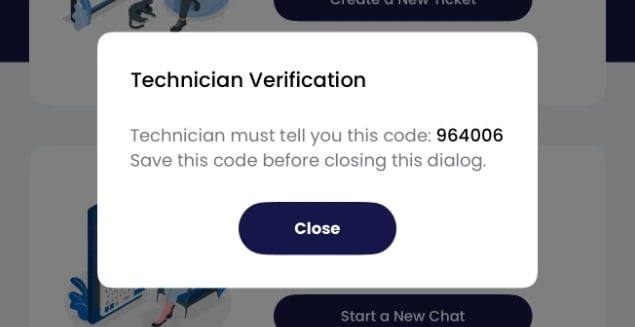
Verification on the Technician’s End
Once your end-user has opted to verify your technician with any of the methods above, a code will be sent for the technician to access in either the MSP Process webpage, or through the MSP Process pod in your PSA to confirm their identity.MSP Process webpage

- Log in to MSP Process
- Navigate to Identity Management _> Verification _> Tech Verification
- Locate the verification request (by end-user name and/or date created)
- Provide the code to the end-user
- Click Confirm
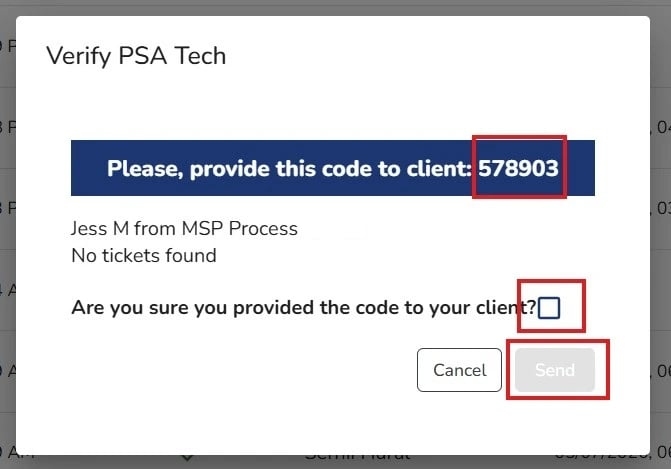
- Upon clicking Confirm, a pop-up window will appear to confirm the code was provided.
- Check the box for “Are you sure you provided the code to your client?” and click Send.

MSP Process Pod in PSA
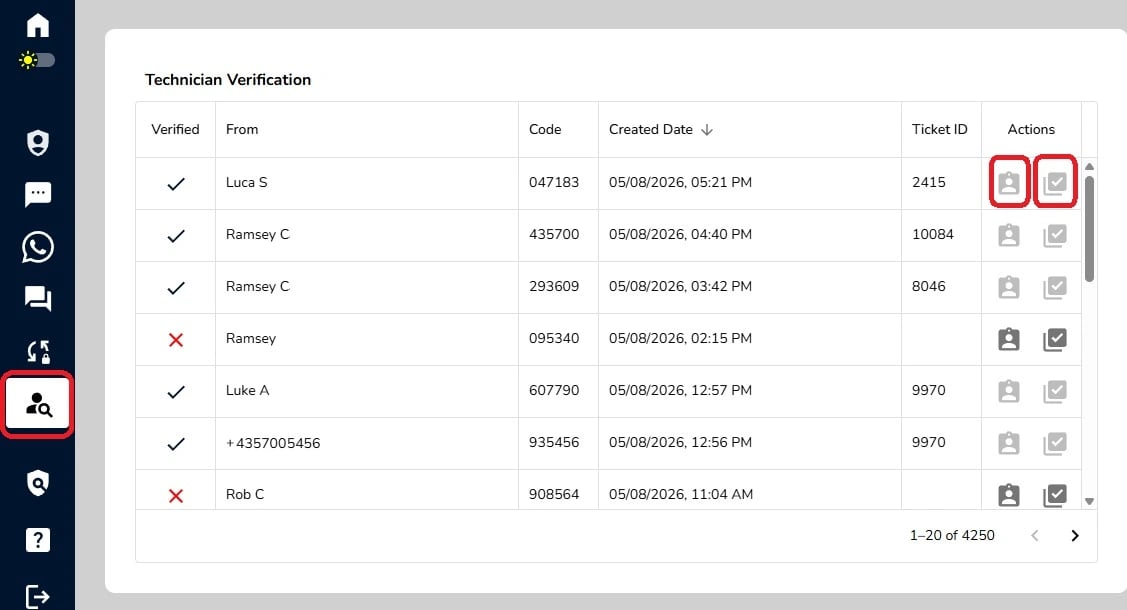
- Who the code was sent from
- The code
- The date it was created
- Ticket ID
- If no ticket has been assigned, your technician can click the Tag with the Silhouette of a person in the Actions section to assign the ticket.
- The Actions tab, where the verification can be completed upon clicking the Checkmark.
- Once the Checkmark is clicked in the Actions column, the Verified column will update with a checkmark as well.