

Overview
A notification group is the entity that holds your on-call team members. You build the group once, then use it wherever MSP Process needs to alert a team, such as an escalation rule, instead of listing phone numbers each time. Each member has their own contact details and can have a schedule. When a notification fires on a group, only members whose schedule is active at that moment are contacted, on every channel turned on for them. This article covers creating a group, adding members and assigning schedules. You can configure groups from Monitor & Notify → Notification Groups.Definition of terms
- Notification group: the entity that contains your on-call team members.
- Notification user: a member of a group. A notification user can be added manually, imported from your PSA, or copied from your MSP Process users. If a schedule is assigned to the user, they are only notified during that schedule.
- Scheduler: a formula with a start and end period, no longer than one year, that describes the times and dates a user is available.
Prerequisites
Check these before you build a group so the first test page reaches a real person.- You have admin access to Monitor & Notify in MSP Process.
- You know your escalation tiers.
- For example Primary On-Call, Secondary On-Call and a manager, so you can create one group per tier.
- You have each person’s mobile number and email address.
- If your PSA is connected, you can copy people from it instead of typing them.
- You know each person’s working hours or rotation, so you can build their on-call schedule.
- The Incidents module is enabled for your account if the group will be used by escalation rules.
- If you do not see the Incidents module, please reach out the MSP Process support.
How to set up a notification group
Work through the steps in this order: create the group, add members, set how each member is contacted, then assign each member a schedule.Step 1: Create the group
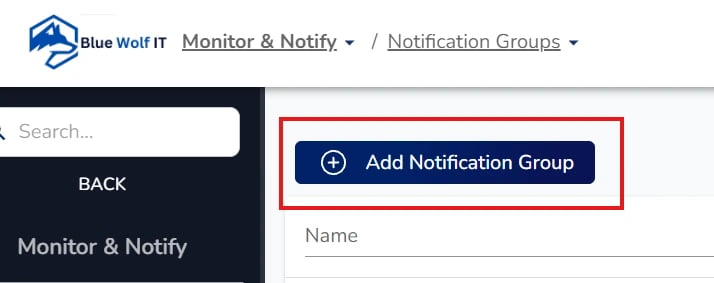
- Go to Monitor & Notify → Notification Groups and click + Add Notification Group.
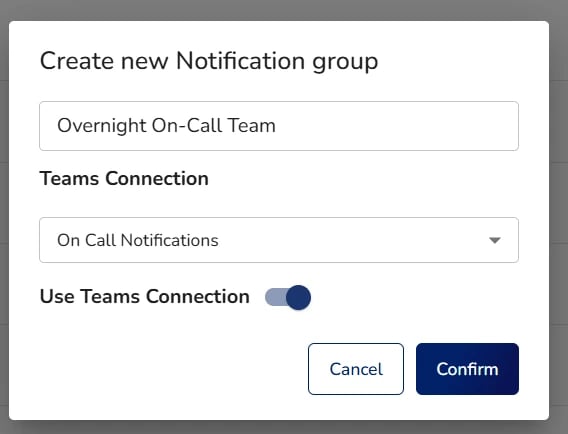
- Name the group for its role and tier.
- For example Primary On-Call, Overnight On-Call Team, or Service Desk Manager, and click Confirm.
- If you want alerts to go to Microsoft Teams, select a MS Teams connection from the dropdown.
- Teams notifications are delivered regardless of members’ schedules. To create a Teams connection, follow the Teams connection article.
Step 2: Add members
Click the pencil (Edit) in the Actions column on the notification groups list. You will be able to update the group name, adjust the MS Teams connection and configure notification users at the top of the page.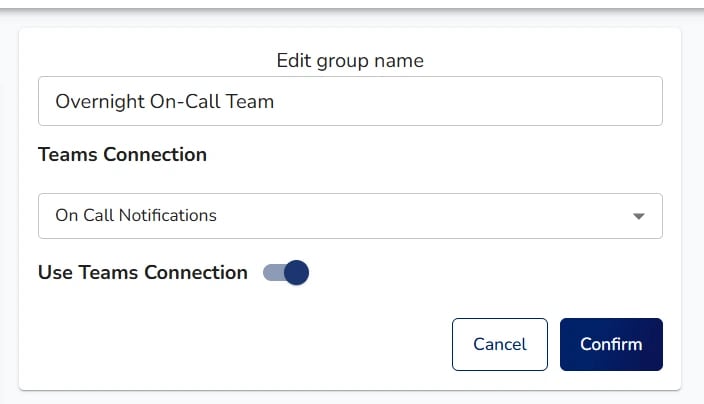
- New: add a new user and enter their details by hand.
- From PSA user: copy the user’s details from your PSA. This needs a PSA integration connection.
- From MSP Process: copy the details from a user in your MSP Process tenant.

Step 3: Choose how each member is contacted
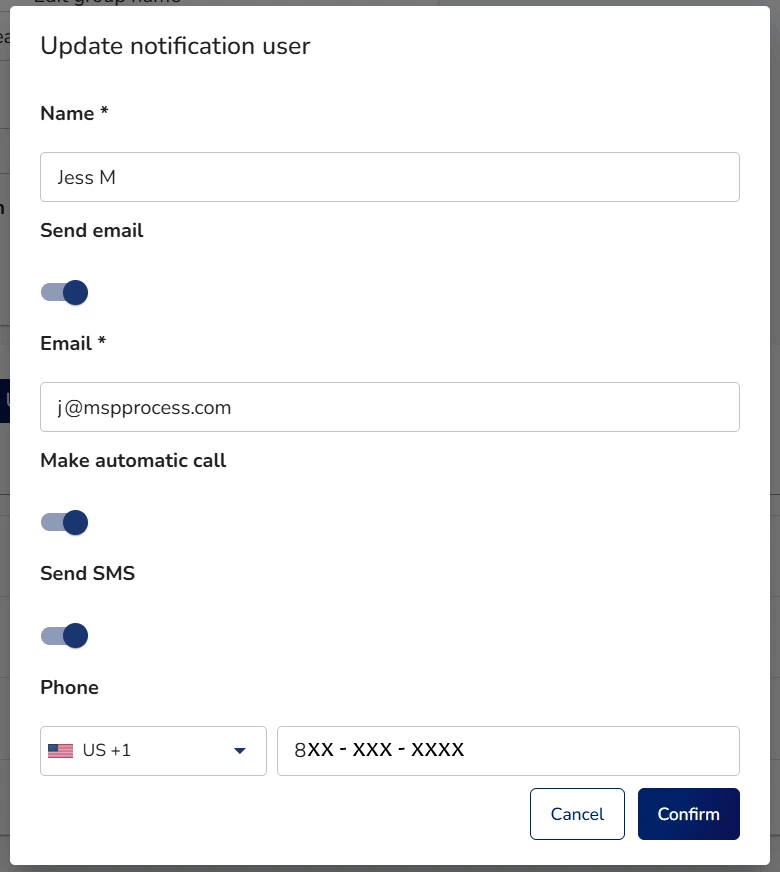
To update how a user is contacts, please go through the steps below:- Edit the member and turn on the channels they should receive: SMS, email, voice, or push.
- Please note that push notifications, the user must have the MSP Process Tech Mobile App installed and logged in from the same email address their MSP Process account is connected to.
- Check the mobile number and email address are correct.
- A member with no mobile number can only receive email.
- Turn on more than one channel for people who must not miss an alert. All selected channels fire at the same moment.
Step 4: Assign a schedule to each member
After you create a notification user, set up a schedule for them. A member with a schedule is only notified during it, and a member can have several schedule rules to cover day-to-day differences in a rotation. Please review On-Call Schedule Using The On-call Schedule Wizard: Admin Setup for more information for on-call schedule creation.Step 5: Test the group
- Once the group is associated with an escalation rule, create a test incident that matches the rule while a member is on shift.
- Confirm the on-shift member receives every channel/notification type enabled.
- Confirm members who are off shift receive nothing.
- Check the escalation logs to see what was sent and when.
- Incident Module & Escalation Rules: Daily Use Guide
Next steps
- Use each group in an escalation rule. See the Escalation Rules article.
- Install the MSP Process mobile app on each on-call phone so incidents can be acknowledged there.
- Share the daily-use article with technicians so they know how to acknowledge an incident.
Pitfalls
Stale contact details- Members are copies of the source user. After a number or email changes, update the member in the group.
- A member with no schedule rule is never on shift when the group is paged.
- Add an on-call schedule for the user, or add the individual user in the escalation rule that should be contacted.
- If nobody in a group is on shift when a step fires, nobody in that group is contacted. Add a later step that notifies a named user, such as a manager.
- A person added directly to a rule step is notified at any hour.
- A single group cannot be both Primary and Secondary. Create a group per tier so each escalation step reaches a different person.
- If you attach a Microsoft Teams connection to a group, Teams messages are sent whether or not members are on shift.
Troubleshooting common issues
Nobody in the group was notified- Confirm the escalation rule names this group in the step that fired.
- Open the group and confirm each member has a schedule rule that covers the time of the incident.
- Open the weekly or daily view in the scheduling viewer and check someone is on shift at that time.
- Confirm the member has at least one channel turned on and a valid mobile number or email.
- Check the schedule rules on each member for overlaps or the wrong days and hours.
- Check the time zone on the schedule.
- Confirm each tier has its own group so Primary and Secondary are not mixed.
- Confirm the member’s phone number is correct and voice is turned on for them.
- Try another phone or carrier to rule out a carrier block on the sending number.
- Ensure that the call did not get caught by the spam filter.
- If it still fails, contact support.
- Open the group and edit the member. Members do not update when the source user changes.
- Update the details in the group, or remove the member and add them again from the source user.
- Check whether the person is added to the rule step as a named user. Named users are always notified.
- Check whether the group has a Microsoft Teams connection, which delivers regardless of schedule.
Reach out to support
If you have worked through the troubleshooting steps and the right people still are not notified, contact MSP Process Support. Please include the following so we can resolve it faster:- The incident or ticket ID, and the date and time it was created, with your time zone.
- The names of the notification group, member, schedule and escalation rule involved.
- Who you expected to be notified, and who was or was not.
- Which channels failed (SMS, voice, email or push).
- Screenshots of the member’s settings and the schedule for that time.