

Introduction
At MSP Process we believe in only setting the minimum permissions required to leverage our application for your business needs. Please find the outline below along with a more granular review of the permissions.Adding a Security Role for MSP Process
- Login to your ConnectWise Manage account
- Navigate to System -> Security Roles
- Add a new role, name it MSP Process, and give it the permissions listed below:
Companies
- Company Maintenance: Inquire (All)
- Company/Contact Group Maintenance: Inquire (All)
- *****Configurations: Inquire (All)
- Contacts: Add/Edit/Inquire (All)
- CRM/Sales Activities: Inquire (All)
- Manage Attachments: Add/Inquire (All)
- Notes: Add/Edit/Inquire (All)
- Team Members: Inquire (All)
Finance
- *******Agreements: Inquire (All)
- ******Invoicing: Inquire (All)
Project
- Project Tickets: Edit/Inquire (All)
- ***Project Scheduling: Add/Edit/Inquire (All) - if using Schedule Assist in Projects.
Service Desk
- Close Service Tickets: Add/Edit/Inquire (All)
- Resource Scheduling: Add/Inquire (All)
- Service Ticket - Dependancies: Add/Edit/Inquire (All)
- Service Tickets: Add/Edit/Inquire (All)
- Service Tickets - Finance: Inquire (All)
- SLA Dashboard: Inquire (All)
- Ticket Templates: Inquire (All)
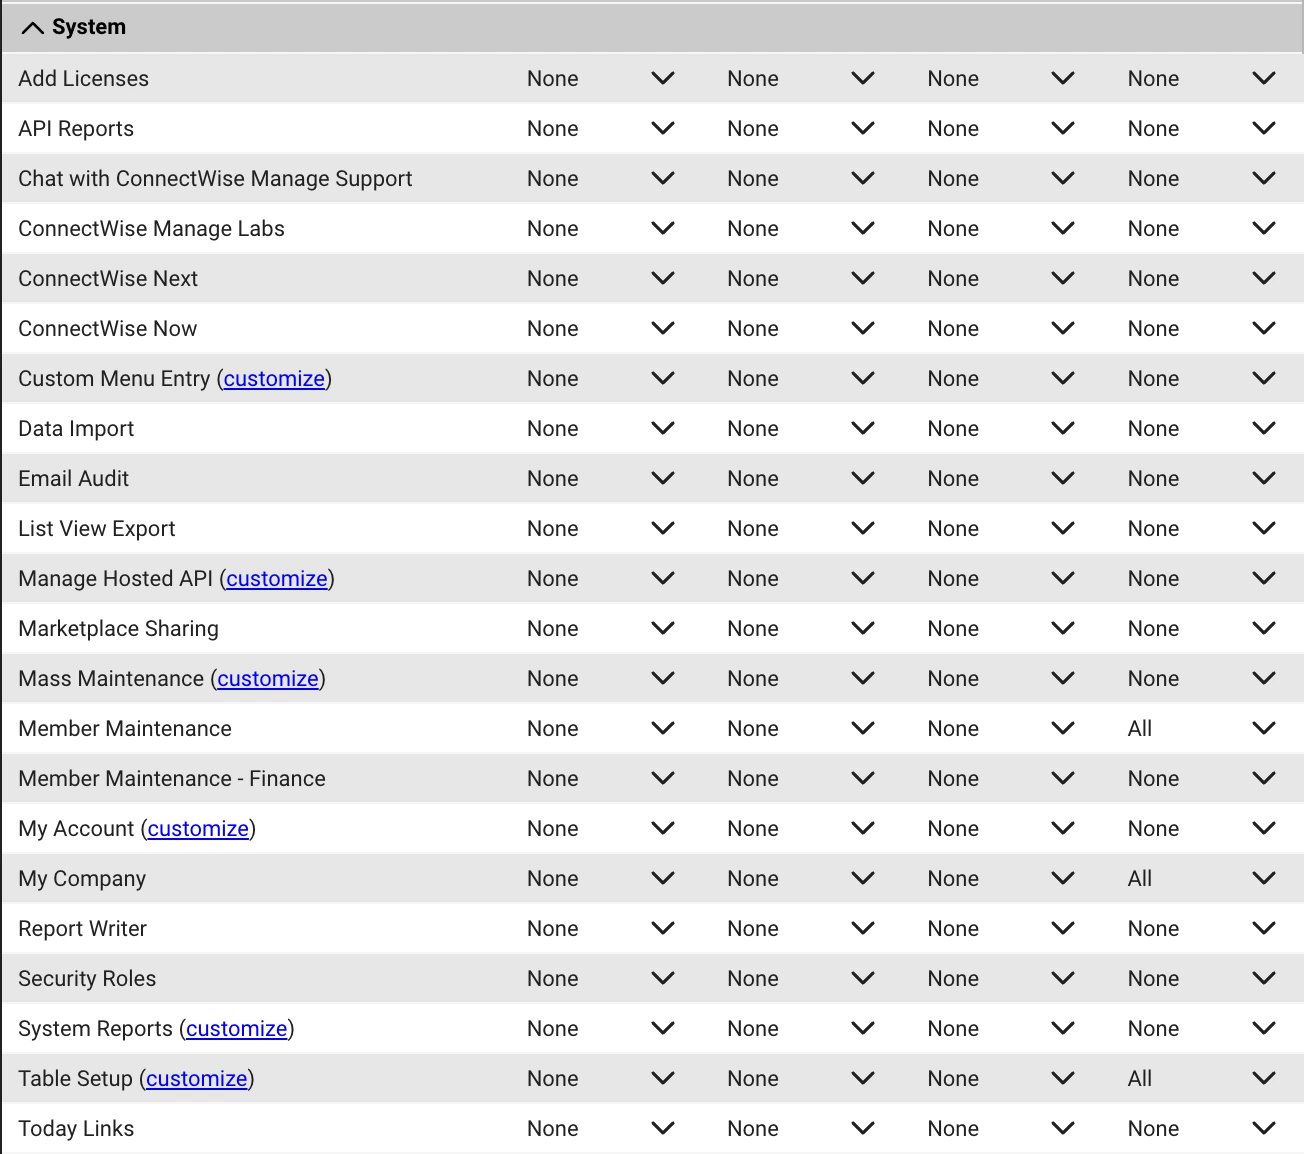
System
- Member Maintenance: Inquire (All)
- My Company: Inquire (All)
- Table Setup: Inquire (All)
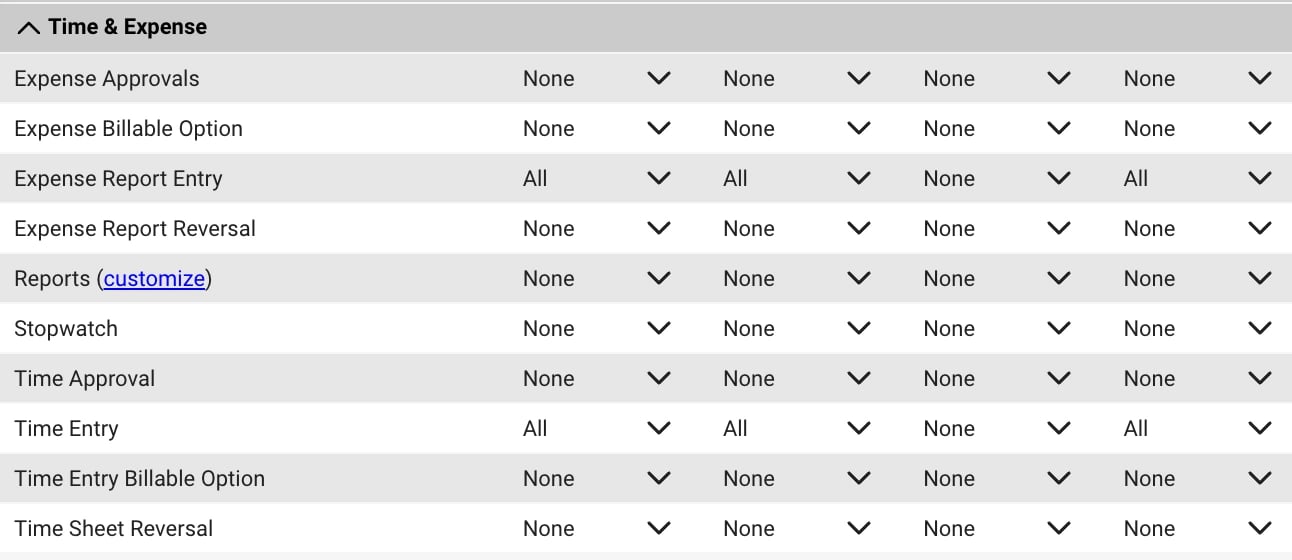
Time and Expense
- *** Time Entry: Add/Edit/Inquire (All)
- **** Expense Report Entry: Add/Edit/Inquire (All)
- Activities / Activity Status-CRM
- Activities / Activity Type
- Company / Company Status
- Company / Company Type
- Company / Configuration
- Company / Configuration Status
- Company / Note Type
- Company / Team Role
- Contacts / Communication Type
- Contacts / Contact Relationship
- Contacts / Contact Type
- Contacts / Department
- General / Auto Sync
- General / Integrator Login*
- Scheduling / Location
- Scheduling / Reminder Time
- Scheduling / Schedule Status
- Scheduling / Schedule Type
- Service / Priority
- Service / Service Board
- Service / Severity
- Service / Source
- Service / Ticket Description Links
- Service / Ticket Templates
- Time / Work Role
- Time / Work Type