Deploying the MSP Process Pod in ConnectWise
The MSP Process pod can be deployed to both the Contact-level UI in ConnectWise, and the Service Ticket-level. This KB article will walk you through how to set both options up.Obtaining the Pod URL from MSP Process
In MSP Process, navigate to Settings -> Integrations -> PSA Integrations and then select your ConnectWise Integration. Then click the copy button as shown below; you’ll need that URL in your clipboard when configuring the MSP Process pod in ConnectWise.Accessing the ‘Managed Hosted API’ Setup Table in ConnectWise
- Login to your ConnectWise instance
- Navigate to System -> Setup Tables
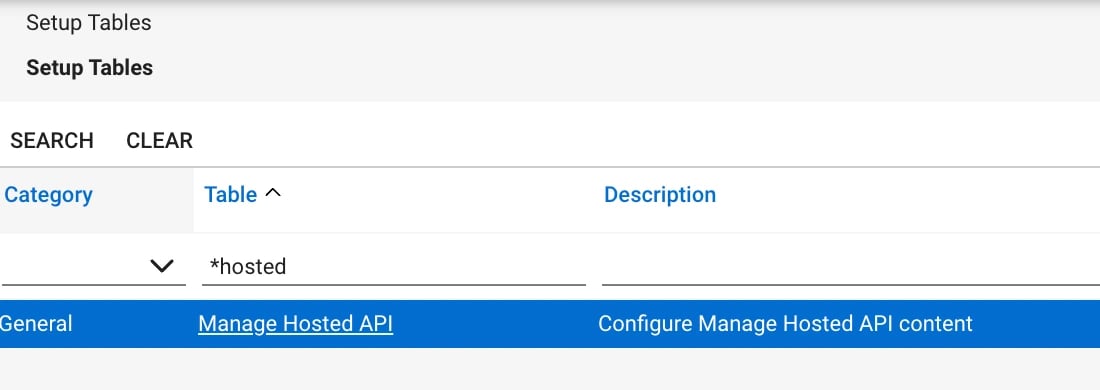
- Search for the word *hosted and click into the Managed Hosted API table as shown below:
Adding the Pod to the Contact-level
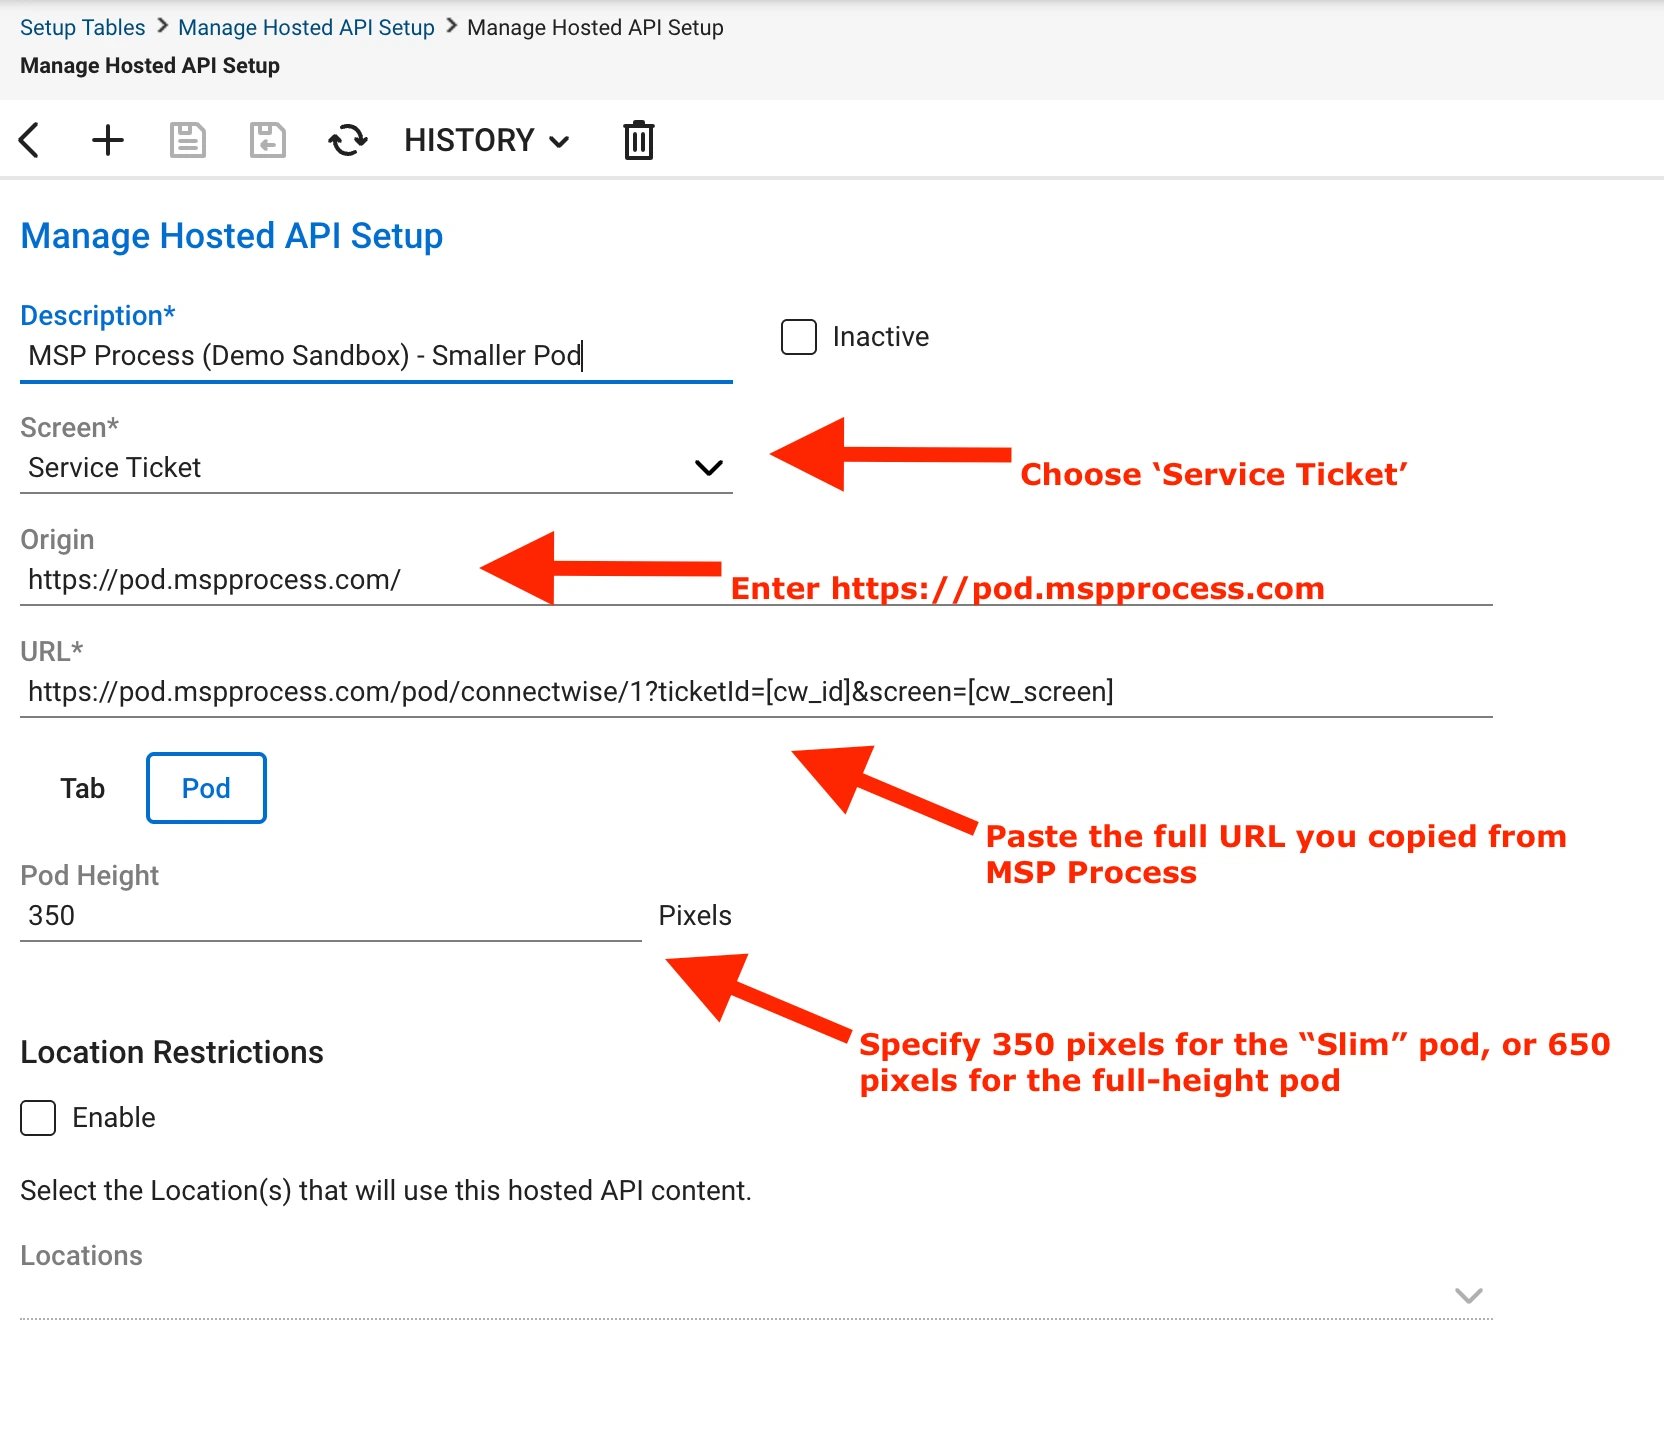
Click the + sign to add a new entry: You can then fill in the information below as shown. The link you copied will be pasted into the URL field. Once you fill in the info click Save and Close.